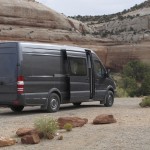
MOAB, UTAH – We had gathered to ride the “Magnificent Seven”, a mountain bike trail that’s 35 miles of slickrock heaven. En route, our shuttle bus stopped so we could park our Sprinter van, and I saw Allen Sutter duck into his Sprinter camper for some gear. By the trailhead, we had discovered we were both Canucks, avid mountain bikers, and loved our Sprinter RVs!
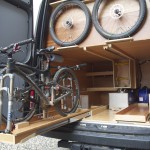
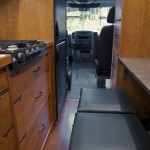
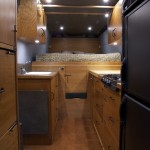
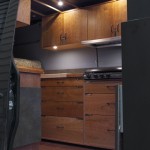
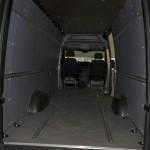
Allen did his own Sprinter DIY conversion, though when you look at the pictures, you’ll realize “DIY” may not be the term that comes to mind. Allen happens to be a professional cabinetmaker, and the owner of Sutter Fine Woodwork, and specializes in high-end residential custom cabinetry. His design reflects this, with tons of beautifully-crafted cabinets inside, as well as having lots of interior LED lights and a rear “bike garage” with slide-out bike drawers. Perhaps the most unique feature is that the entire interior is completely removable in about two hours with a power screwdriver!
I asked Allen about his Sprinter conversion, and the ins and outs of his DIY Sprinter camper.
What were your major design goals? “We wanted a gourmet kitchen with a generous refrigerator, a very comfortable full-time bed, lots of light, lots of storage and a garage for bikes and other gear.”
Did you end up doing several designs, or just one? “I went through a few arrangements until I came up with a plan that worked for us. I don’t start construction on any project until the details are nailed down and the only adjustments were in the fitting.”
About how long did the conversion take you to design and build, and roughly how much did it cost? “About two months beginning to finish, including insulating. Most of the materials I used were leftovers from jobs and inventory items. Because of this, my costs would differ from the average person doing the same conversion.”
What are the features of the design that you feel turned out the best? “Everything worked just as we wanted and expected. The Atwood cooktop has a fantastic temperature range. Cooking with gas (propane) is so controllable that if you do a lot of fine cooking (which my wife would not compromise on), it is indispensable. Unfortunately, this means carrying propane, but we found it was worth the trouble. The little pullout step for getting into the bed also worked well as another seat…Having the two stacked storage bins by the sink pull out for seat bases and the cushions stored under the sink by the trash made for very efficient dual use and worked well for both. With the flip-up tables and seat arrangement we had dining with a view. It was good to have the only window located in the side door so that the space could be used to maximum efficiency and insulated more completely.”
What are the things you wish you’d done differently? “I will do these changes in the new version:
- Solar power system or fuel cells, can’t decide which but cost may determine the choice. We were just running off the van’s auxiliary battery, but if we were not driving regularly we would run out of power and have to use a generator (we don’t see that as a good option).
- May go to an electric water pump and demand heater, even though the hand pump faucet worked well and heating water on the stove was efficient enough, once we established a routine. May just keep it light and simple too.
- Frame and panel doors and large drawer fronts, instead of one-piece, to reduce weight.
- The upper cabinets will be attached to the lower units so that the construction is even more unified for ease of installation and removal and even some added safety.
- Modify the fastening system (cabinets to van) to make the installation/ removal process more efficient and have better longevity with repeated assembly and disassembly.
- Marine LEDs which are not as finicky as interior LEDs which have to be voltage-regulated. The marine LEDs have a broad voltage range, so the whole system can be much simpler and more efficient than the home system I used.
- Try to make it lighter. We are close to the rated weight capacity of the van now and want to keep it as low as possible without compromising our priorities.
- Remove the rage hood. It drew too much power and was redundant with the roof fan anyway…. will just use a heat deflector.
- Organize the garage a little better, get rid of the gravity filter (too slow) and go to a hand pump ceramic filter for stream water instead and keep the sediment/ carbon/ UV system for town water, will adjust shelving and tie-downs as necessary.
- 120 litre stainless steel water reservoir (upgrade from 60 litres)
- Different latch system, possibly central lock-down. Too often, we would forget to latch a drawer and it would fly open while making a sharp turn.
- Will add a catalytic heater, since we need propane for the cooktop anyway.
- Still on the fence about an awning, we would like to keep the van “stealth”
- Would prefer to also avoid body penetrations if possible. Cutouts are easy to do, it just makes it inconvenient when the cabinets are removed and even more so if you want to make changes in the future.”
Gallery – Allen Sutter’s DIY Sprinter Camper Conversion
 |
 |
 |
 |
 |
 |
ASKING YOUR FEEDBACK: Do you have a DIY Sprinter conversion? If so, what would you do differently on your next build?



Comments on this entry are closed.